Quick guide: How to Get the Perfect Sleeveless Future Trunks Jacket
It is very rewarding to make a jacket yourself. This article below will discuss the necessary steps to DIY your own sleeveless Future Trunks jacket. From gathering materials to sewing techniques, we’ve got covered for you.
- Materials Needed: Sturdy fabric, scissors, measuring tape, sewing machine and an iron.
- Taking measurements of body size
- Cutting the Fabric
- Sewing the Jacket
- Adding Details
- Final Touches
Are you ready? Here is a detailed guide on Steps to DIY a Sleeveless Future Trunks Jacket
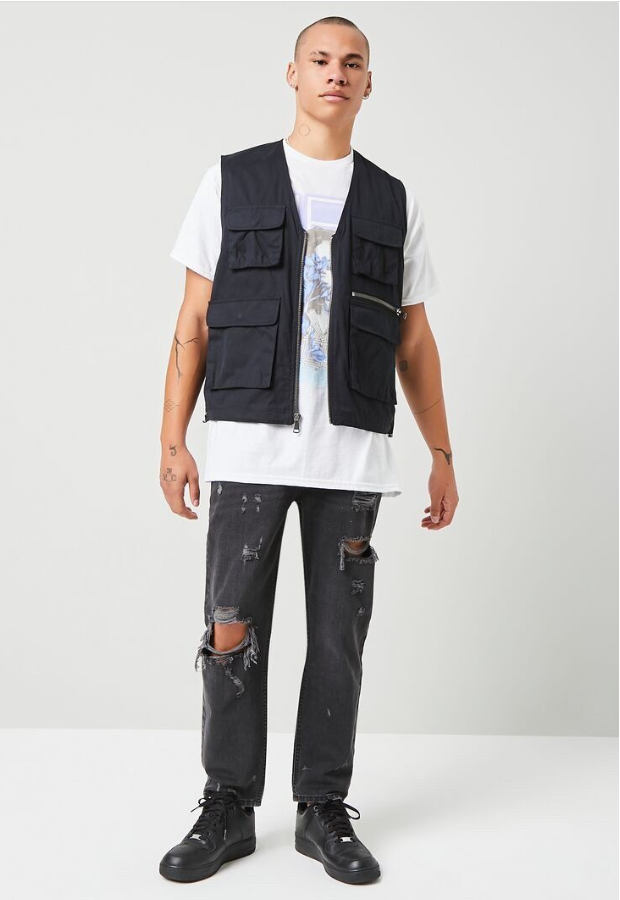
In the world of fashion, the sleeveless Future Trunks jacket is a popular and stylish piece of clothing. This stylish sleeveless jacket is not only trendy but also versatile, making it a must-have in any fashion-savvy individual’s wardrobe. If you are interested in DIY, why not make your own sleeveless Jacket by yourself. From gathering materials to sewing techniques, this guide will provide valuable insights that will help you make Steps to DIY a Sleeveless Future Trunks Jacket. So, if you’re interested in styling sleeveless jackets , keep reading!
Materials Needed
To create a Future Trunks-inspired jacket, you’ll need a few key materials.
- Sturdy fabric: Choose a sturdy fabric with a slight stretch, such as cotton twill or denim, to ensure durability and a good fit.
- Scissors: Invest in a good pair of fabric scissors that are sharp and suitable for cutting through the chosen fabric.
- Measuring tape: A measuring tape is essential for taking accurate body measurements and determining the dimensions of the jacket pieces.
- Sewing machine: Having access to a sewing machine will make the sewing process faster and more efficient. Make sure the machine is in good working condition and has the necessary stitches for garment construction.
- Iron: An iron is essential for pressing the fabric and achieving crisp seams and hems, giving the jacket a polished and professional look.
Taking Measurements Of Body Size
To do this, you’ll need to take a few measurements. Start by measuring your chest, wrapping the tape around the fullest part of your chest and making sure it’s parallel to the ground. This will determine the width of the jacket’s chest area. Next, measure your waist at its narrowest point, usually just above your belly button. This will help determine the jacket’s waistband or bottom width. For length, measure from the base of your neck to your desired length. To ensure proper movement and comfort, measure around the fullest part of your arm to determine the armhole size. Finally, measure across your back from one shoulder point to the other to determine the width of the jacket’s shoulder area.
Cutting The Fabric
First, place the fabric on a flat surface and lay the front and back pattern pieces on top. Ensure that the fabric is aligned with the grainline indicated on the pattern. Pin the pattern to the fabric and carefully cut around the edges. Remember to cut two front pieces and two back pieces, one for the outer fabric and one for the lining if desired.
Second, place the collar pattern piece on a folded piece of fabric. Pin it in place and cut around the edges, making sure to cut through both layers of fabric. This will create the collar piece that will be attached to the jacket later on.
Lastly, using the armhole and neck facing pattern pieces, place them on the fabric and cut around the edges. These facing pieces will be used to finish the raw edges of the armholes and neckline.

Sewing The Jacket
To do this, you must first place the front pieces on top of the back pieces with the right sides facing each other. This ensures that the seams will be hidden once the garment is complete. Once you have aligned the edges properly, it’s time to pin the sides and shoulder seams together. This step is crucial to ensure that the garment fits properly and looks neat. Once you have pinned the pieces together, it’s time to stitch them. You can use a sewing machine or hand stitch along the pinned edges. However, it’s important to leave the armholes and bottom open to allow for movement and comfort. With these steps, you can create a beautiful and functional garment that will last for years to come.
To do this, you must first align the collar piece with the neckline of the jacket, making sure that the right sides are facing each other. This is crucial for ensuring that the collar sits properly and looks neat when the jacket is worn. Once you have aligned the collar, you should pin it in place, taking care to match any notches or markings on the collar and neckline. This will help to ensure that the collar is attached evenly and doesn’t shift during the sewing process. Finally, you can sew along the pinned edge, attaching the collar to the jacket and completing this important step in the jacket-making process. By following these steps carefully, you can create a beautiful, well-fitting jacket that will last for years to come.
To do so, first ensure that the right sides of the facing and jacket are together. Then, align the edges of the facing with the armhole and neckline, and pin them in place. Once the facings are securely pinned, sew along the edges to attach them to the jacket. After sewing, trim any excess fabric and clip the curved edges to ensure a smooth seam allowance. This process will help to create a polished and professional-looking jacket, with facings that lay flat and do not bunch or pucker. Taking the time to properly attach the facings will ensure that the finished product is both functional and aesthetically pleasing.
The process of hemming involves folding the raw edge of the fabric to the desired length and securing it in place with stitches. To begin, fold the raw edge of the bottom of the jacket to the desired hem length. This can be done by measuring and marking the fabric or by trying on the jacket and visually determining the appropriate length. Once the fold is in place, use an iron to press the fabric and create a crisp crease. This will help to ensure that the hemline is even and straight. Next, fold the fabric again to enclose the raw edge and pin it in place. This will prevent fraying and ensure that the hemline remains neat and tidy. Finally, sew along the folded edge, using a sewing machine or by hand, to create a secure and polished hemline for the jacket. With these simple steps, anyone can achieve a professional-looking hemline and take their jacket to the next level.
Adding Details
To enhance the overall look of your sleeveless Future Trunks jacket, you can add various details that capture the essence of the original design. Decide on the type and placement of pockets on your jacket. You can opt for flap pockets, welt pockets, or patch pockets. Follow the pattern instructions to cut and sew the pockets onto the jacket. You can also add buttons or snaps as closures for the front of the jacket. Choose buttons or snaps that complement the style and color scheme of your jacket. Consider adding decorative trimmings such as ribbons, piping, or contrasting fabric along the edges of the collar, armholes, or pockets. This detail can elevate the overall aesthetic and mimic the original design.
Final Touches
Before considering your sleeveless Future Trunks jacket complete, there are a few final touches to ensure a polished and professional finish: Use an iron to carefully press the seams and any remaining wrinkles on the jacket. This step will give your jacket a crisp and well-kept appearance.
Once the jacket is pressed, try it on to assess the fit and overall look. Pay attention to how it drapes on your body and make any necessary adjustments, such as taking in or letting out seams, to achieve the desired fit. By pressing the jacket and making final adjustments, you can ensure that your sleeveless Future Trunks jacket looks its best and fits comfortably. Take the time to make these final touches, and you’ll have a DIY garment that reflects your style and creativity.

Conclusion
By following these steps, you can DIY your very own sleeveless Future Trunks jacket. With the right materials and a little bit of patience, you can have a unique and stylish piece of jacket that pays homage to one of the most iconic characters in anime history. So, gather your supplies and get ready to show off your DIY skills with this fun and exciting project.
FAQs
Q1: How do I determine the right size for a sleeveless Future Trunks jacket?
To ensure the perfect fit, measure your chest, waist, and hips, and compare the measurements to the size chart provided by the manufacturer. It is also important to consider the style and material of the jacket, as they may affect the fit.
Q2: What are the different styles of sleeveless Future Trunks jackets available?
There are several styles of sleeveless Future Trunks jackets available, including classic, biker, military, bomber, retro, and contemporary styles. Each style offers a unique look and features that cater to different preferences.
Q3: What materials are used to make sleeveless Future Trunks jackets?
Sleeveless Future Trunks jackets are made from various materials, including leather, denim, cotton, and synthetic materials. Each material has its advantages and disadvantages, so it is important to choose one that suits your needs and preferences.
Q4: How can I style a sleeveless Future Trunks jacket?
A sleeveless Future Trunks jacket can be styled in various ways, depending on the occasion and personal style. It can be paired with jeans and sneakers for a casual look, or with a dress and heels for a dressy event. The versatility of the jacket makes it a great addition to any wardrobe.
Q5: How can I take care of my sleeveless Future Trunks jacket?
To ensure the longevity of your sleeveless Future Trunks jacket, it is important to follow the care instructions provided by the manufacturer. This may include avoiding exposure to direct sunlight, keeping the jacket away from water and heat sources, and cleaning it with a gentle cleaner and soft cloth.